Sunday, December 06, 2009

Holiday Baking

Yesterday was the perfect baking day. It started raining at 12am and didn't stop all night. By late morning, the rain had turned into big, wet snowflakes. It was cold and messy outside, so I stayed home and made a stew and dessert. The plan had been to start making candies for my holiday care packages, but it was too humid so it had to be cake instead. Well actually, a tart. An Austrian Linzertorte, to be exact.

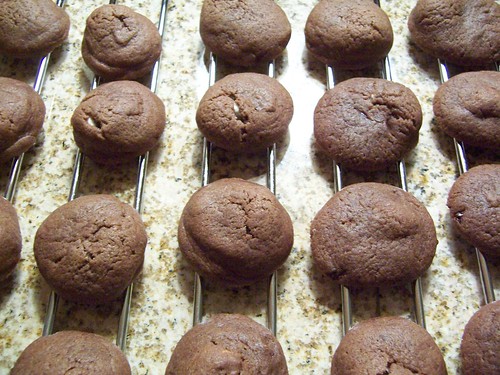
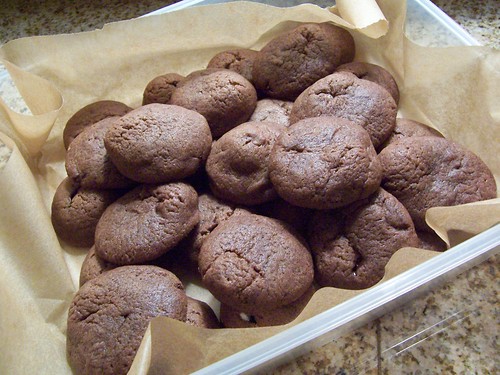
I love Linzertortes. I love to make them, because the results are a lot more impressive-looking than the actual effort - they are as beautiful as making a perfect lattice-top pie, but much quicker and easier. I love the way they taste, and I love that if I have any extra dough, I can make Linzer cookies with them. I could also do away with the entire tart and go straight for the cookies, which are just as gorgeous, and travel well in holiday cookie tins.

I used this recipe from epicurious.com because it called for almond flour, which I had on hand.
http://www.epicurious.com/recipes/food/views/Linzertorte-109549


Traditional Linzertortes all use a nut flour - usually almond, sometimes hazelnut or walnut. The recipes that didn't use ground nuts I passed on, because then I would just be making a spiced tart, not a Linzertorte. The nuts are usually what the store-bought versions skimp on too, which always makes for a huge disappointment. I don't have a food processor so I prefer to buy the nut flour. Almond flour is the easiest to find and least expensive. The large proportion of nuts to flour in the dessert makes the crust particularly fine and crisp-crumbly. While it's baking, the butter baking with the almond makes the most amazing sweet, rich, nutty aroma. Although the recipe is straightforward, the use of nut flour and almost a full jar of jam makes it a relatively expensive dessert to make, but oh, so worth it. You be the judge.

Tuesday, May 05, 2009

Ice cream

It must've been a couple of years ago that my mom first told me about how it's possible to make ice cream in a ziplock bag. I'm not sure why I haven't tried to make it up until now, considering that I've been experimenting with sorbet, but it was probably because I didn't know where to get rock salt.

If I'd ever bothered to look, I'd have noticed that coarse sea salt is available in my local supermarket for pennies.

So last weekend, I assembled a carton of milk, a bag of ice, some sugar, some vanilla flavouring, and some coarse salt.

At first, I tried the ziplock bag method. That's where you put the milk with flavourings inside a small sealed ziplock bag, which is in turn placed inside a larger bag full of ice and salt. And then you shake it. And shake it some more. And shake it until your hands freeze. And then you put on some oven mitts, and shake it again. Until, supposedly, it turns into ice cream. Unfortunately, my arms got tired first. I decided that the ziplock bag method is a novelty stunt good only for entertaining small masochistic children.

So then I dumped the partially frozen milk out into my rice cooker's pot (not having any other metal containers of the right size), and sat it in a mixing bowl full of salted ice. I stirred it first with a whisk, and then with a spatula, which was much less tiring.

It's remarkable how cold the salt makes the ice - frost condensed from the air started forming on the surface of the outer bowl.

Eventually, the mixture stiffened into something resembling a lumpy soft serve, and when it stopped getting any stiffer I tipped it into a container and put it in the freezer.

And there I stopped. And the ice cream got very hard. It probably would've been a better idea to take it out and give it a stir every hour or so, like I do with sorbet. But it was still good. It tasted like those milk popsicles, and was even better with chocolate syrup. I used 2% fat milk, but whole milk or even heavy cream would have made a much richer ice cream. I think I might try making frozen yoghurt next. If I can make that much yoghurt.

Tuesday, April 28, 2009

The flavour of money

I've figured out how to make my home-made sorbet taste all fancy and expensive.

Put basil in it.

Or rather, infuse the basil in the hot simple syrup, if you want to get all culinary.

And now that I know how fancypants sorbet makers get their sorbet to taste like that, all I can say is, that's so cheap! I was expecting magical fairy dust, or something.

Saturday, April 11, 2009

Knitting Is An Adventure


I've been on a roll lately, and this is my latest project - the second top I have ever designed completely from scratch. Well, not completely from scratch - I got the hem edging pattern from my stitch dictionary, Knitting Stitches by Mary Webb.


When I started this project, I didn't know how it was going to look. I had a vague image in my head of a square neckline, and some patterning on the bottom edge, and knitting it in the round so there would be no seams, but other than that, I really had no idea.

The white-and-red flecked yarn was another one of those discount balls from a Fa Yuen Street yarn stall... It appeared to be made of cotton, and thought that it would be enough for a tank top, but I was wrong. I ran out when I was nearly up to the armpits.


So, it was time to find some more yarn. I knew I wasn't ever going to be able to match the colour, but I figured a colour change would look OK. I raided the yarn stores and found myself two balls of deep orange cotton, and another two balls of grey lace weight crochet string. I decided to knit both strands held together to make up the thickness.

Cotton costs an arm and a leg! But no matter, I pressed on.

And then, I knitted all the way up to the shoulders and found I'd miscalculated. My colour change was located at least an inch too high. It looked ridiculous, like a baby's bib. But I didn't want to frog it, so I carefully detached the top part from the bottom part, added a stripe, knitted up another inch of orange, and then painstakingly grafted the two halves back together. I can now say that I have taught myself how to graft ribbing. It was horrible. The only instructions I could find on the internet made no sense, and it was only by squinting very hard and exercising my full (but limited) mental capacity for rotational symmetry that I managed to figure out which way the yarn should be threaded when the knit stitches changed to purl. I'm thinking that organic chemistry majors would have a significant advantage over me in kitchener stitching.

Here's a picture of my grafting-in-process.


I should write up some better instructions myself.

And then I got up to the shoulders, grafted those together, and then I decided I wanted short sleeves. I'd been reading about knitting sleeves top-down in the round, by picking up stitches around the armhole, and using short rows to form the cap. I decided to give that a try. The hard part was trying to figure out to vary the steepness of the the short rows correctly, which meant trying to imagine what the sleeve would look like if it were spread out flat.

First attempt - Sleeve too big and too wide.
Second attempt - Added decreases. Sleeve no longer too wide, but now too short.
Third attempt - Used steeper gradient. Sleeve longer, but had excess material bunching around the armpits.
Fourth attempt - Added decreases around the armpits. Sleeve looks OK. Except yarn has been frogged so many times, it's starting to look a bit manky. Oh well.

And finally it was done.


Of course, the minute it was done I dropped a spare rib with barbecue sauce on it and then got crapped on by parrots, so it's going straight into the laundry. Sigh.

I am definitely going to try to write this pattern up and sell it on Ravelry, even though working out the size conversions is going to be a nightmare. I'd be happy if I made back the cost of my yarn.

Monday, April 06, 2009

Oh right, I forgot about my mom's poncho


I made a poncho for my mom this past winter, but didn't get around to having her take a picture of it until now. I got the wavy scalloped pattern out of a stitch dictionary, and just kept going, and going, and going. This is definitely the last time I will ever make a poncho. I began it in August and finished it in early December; I think my brain was starting to melt towards the end.

At least I used up all my grey acrylic yarn. Now I can load up on more interesting ones, yay.

By the way, acrylic doesn't have to be stiff and nasty. It softened up nicely after being blocked under a hot steaming iron, and acquired a lovely drape. The pattern holds its shape, it's machine-washable, and won't ever need to be blocked again. In a household where wool sweaters periodically get shrunken in the wash, this is a good thing.

My mom seems to like it a lot. She says her friends have been complimenting it, so I'm happy.

Thursday, March 26, 2009

Trying out Ravelry

At Lana's suggestion, I finally decided to set up a Ravelry account, and man, my head hurts. I feel I've been given a military fighter jet to travel 2 blocks to the grocery store, and I'm sitting in cockpit staring at the controls going, "Okay, what do I do now?"

I can theoretically see why some people would need all those features (Lana, how does your stash fit in your house?) but I'm as basic as basic gets. My entire yarn stash fits into a single plastic shopping bag, I don't plan projects far in advance, I don't have a pile of works-in-progress, and I don't collect patterns for future use. My entire process consists of picking up some discount-bin yarn, going "I think I'll make a hat this week", Googling around a bit, and then pretty much winging it.

It's going to take me a while to figure out how this works.

I've managed to upload a picture and details of one project so far, and am trying to figure how to submit patterns. (Apparently it takes a couple of weeks to get approved). Guess I'll be hogging Boyfriend's digicam for the next couple of days, documenting my past projects. I lost most of my old photos in the Great Hard Drive Crash of 2008. At least this time I'll get to take pictures in daylight, and it'll be an opportunity to photograph some really old items that didn't seem worth blogging about because they were old news.

Friday, March 20, 2009

The perfect sponge cake

After years of trial and error, I have perfected my sponge cake! And now I shall cackle like a mad scientist. Bwaahahahahahaha! It's ALIIIIIIIIVE!


No, I didn't make it up from scratch. I originally got it out of a microwave cookbook my aunt gave me years ago, memorized it, lost the original recipe, forgot it, half-remembered and half-improvised it, tweaked it, substituted plain flour for cake flour, took out some baking powder, fudged the oil-to-milk ratio, put back some baking powder, found a better way of mixing it, and finally I'm happy with it.

It doesn't taste of baking powder, it rises a good amount, it doesn't collapse into a pancake on the bottom, it isn't dry, and it isn't lumpy.

It is so smooth and so fluffy and so moist. Just like the cupcakes you get from Chinese bakeries. I suppose it's not even a true sponge cake because it contains egg yolk and oil, but it sure tastes like one. Any food scientist care to explain why the addition of fat doesn't seem to collapse the air out of it?

Recipe:

Ingredients:

3 eggs - separate the whites and yolks, keep the yolks
1/2 cup sugar

1 1/4 cup plain flour
2 tsp baking powder
1/4 tsp salt

1/2 cup milk
1/4 cup vegetable oil
1/2 tsp vanilla essence (or 1/4 tsp vanilla extract)

Instructions:
1. Preheat oven to 180 degrees celsius
2. Whisk egg whites and sugar together until stiff peaks form
3. In separate bowl, sift flour, baking powder, and salt together.
4. Add milk, vegetable oil, egg yolks, and vanilla essence to the flour and mix well.
5. Fold the flour mixture into the egg whites
6. Pour into ungreased 5" X 9" loaf pan/cake tin, and bake for 40 minutes or until skewer comes out clean.
7. Cool upside-down. (Balancing the corners of the cake tin on the rim of a saucepan is a good strategy). Pry from edges of cake tin with knife, and tip it out.

Fleeced: This is the Scarf That Never Ends...


I managed to buy half a metre of black fleece on sale, and used it to line my curling stockinette scarf. Thanks to MooCow for the tip on TechKnitting - the instructions for sewing knitting to fleece were great. It came out a bit wobbly, but still good.

It took foreeeeeever. I mean, Hole E. Cow. I made that scarf way too long - when I wrap it round my neck it dangles almost to my knees. I've learned my lesson. Never will I knit a scarf in stockinette again. Especially not one longer than my bed.

Wednesday, March 11, 2009

Cloudy Cardigan - completed


It's not a very good photo because I had to use my laptop's webcam - didn't want to wake Boyfriend up to borrow his digital camera and card reader - but you're not missing much. It's not like there's any intricate detail on this one.

The fastening is a hair bobble tie that I picked up in Mong Kok for pocket change. I originally wanted to use one of those gigantic goofy-looking safety pins, but I couldn't find one.

I'm actually quite pleased with the way I fit the sleeves. The last time I tried to improvise a sweater (several years ago), I got the armhole and sleeve shaping a bit off and the material bulged out a bit strangely from the shoulder. This attempt turned out much better.

If anyone's interested I'll be happy to post the pattern, if I can remember what the hell it was I did.

Tuesday, March 10, 2009

Cloudy Improvised Cardigan


I managed to get to Fa Yuen Street market to buy some giant balls of discount yarn. For HK$15, you can get a ball of yarn almost as big as your head, yielding 2-3 times as much as a normal skein. The yarn merchants only come out in the winter - in warmer months, they switch to selling costume jewelry - and you'll probably never find the same colour twice, so you've got to load up while the getting's good.

Two giant balls of blue, white and grey variegated was just enough to make me a cardigan. For once, I managed to take a picture of while it was still a work in progress, so here's the back and part of one side. It's finished now, I just don't have a picture yet.

I'm not that happy with the colour, which puts me in mind of the Microsoft wallpaper background circa 1995 (there weren't many choices), but it was an opportunity to practice designing my own garment on the cheap. You wouldn't believe how many times I've had to rip it out and start all over again.

You see, I've imposed something of a dilemma on myself. I have so little patience with patterns that it's rare that I'd follow instructions from beginning to end for anything bigger than a hat. I don't want to make someone else's idea. I want to make my own. But since I won't follow instructions, I've limited my options for learning new techniques, so for years I've been basically stuck on "knit" and "purl".

To try to get myself past that, I bought a basic stitch dictionary. It lets me cobble together various stitches so that I can at least pretend that I'm innovating, which prevents me from getting bored. It's also useful for learning the basic principles behind knitting, which are never really explained in whole-garment patterns. So that's how I put my cardigan together.

Add to all this my aversion to careful measuring and math, and what you get is a lot of trial end error, mostly error. I had to figure it out as I went along. I learned how to make a stockinette stitch folded hem. I learned that the vast majority of lace patterns (and I must've tried five or six before settling on rows of simple eyelets) look terrible in a knobbly, variegated yarn. I learned that my arms are a lot thicker than I think they are, and that sleeves contain a lot more material than you'd think they would. I learned how to make button holes (much more straightforward in crochet than knitting!). I learned how to shape an armhole, and a sleeve top (tricky). I learned how many rows of half double crochet are needed to stabilize stockinette stitch edge curl (five). And I learned how to sew an invisible seam.

I figure with all the frogging I did, I must've knitted two backs, three sleeves, and 1.5 fronts, just to make 1 sweater. You wouldn't want to subject expensive yarn to all that frogging.

I'll try to get a picture of the finished product up soon - it's in the wash due to an unfortunate parrot-related incident.

Scarves!

Winter seems to have come and gone early this year. It was hot through November, freezing in December, miserable through January, and then unexpectedly warm and muggy in February. Now the cold seems to be making a final comeback before we launch full on into rainy season, and it's only the beginning of March.

So I never got around to blogging about my knitting projects because I thought winter would last a bit longer. In fact, by the time I got anything made it had already started to get warm. Here are two scarves I made to replace my favourite fuzzy brown scarf I lost on the train, but by the time they were done, I didn't need to wear them anymore.

This is the stripy scarf I made out of various leftover scrap balls of yarn. I didn't think apple green and maroon would ever look good together, but spaced out with the grey, the combination isn't bad. Unfortunately, I made the classic rookie mistake of knitting in stockinette stitch, and now it's got a fearsome curl that even steam-pressing won't eliminate. I'm thinking I'll have to sew a backing on to straighten it out, but haven't decided what to use. Fleece might be too heavy (and expensive!) and I don't fancy the thought of knitting another piece that long in plain garter. I do have a mile of maroon T-shirt material in my closet that was given to me by my mom's friend who owns an underwear factory in Shenzhen. Might look hideous though.


And here's my bamboo scarf. I bought three rolls of bamboo yarn from Spotlight, the giganto-Australian craft store that opened a branch in Kowloon Bay last year. It's a bit pricey by my standards, so I can't make anything much bigger than a scarf, which is really too bad. It would make such an amazing long cardigan or tunic. Bamboo is a surprisingly soft, silky, drapey fibre, and I can't help getting mental images of assembly lines manned by pandas chewing through the stuff. The only drawbacks are that the yarn splits easily (not a big deal) and that it must be delicately washed and can't be tumble dried.


I did a simple slip stitch pattern to show off the length of the yarn, but now that I look at it, there's a bit too much garter stitch going on and not enough slipping.


Guess that's what happens when you hate frogging even more than you hate following patterns.

Sunday, January 18, 2009

Christmas Packaging Tips


This year for the holidays our family decided to exchange food gifts instead of expensive presents. Given the current economy, I'm sure that we were not the only ones to do so. Little did I know what I was getting into. Making and/or purchasing the food items was the simple part. Each household got a bar or two of chocolate from ACKC, a local chocolatier, some spices from local spice company Vanns, a package of peanut brittle, and a package of biscotti. All were items designed to travel well. For local friends, I made up a batch of cranberry white chocolate chip cookies and extra peanut brittle.

Nice, right? Yeah, nice, until you have to figure out how to package everything. Am I the only idiot who did this?? I went to Michaels (3 separate occasions), JoAnn, Pearl Art & Craft, Target, the Container Store, World Market, and even CVS. None of these were in the same location except Michaels and JoAnn. Even that did not work in my favor. I had to purchase cellophane online from JoAnn because every store I went to either did not stock it or had run out. I looked on Martha Stewart's Web site for ideas, but her ideas, while beautiful, involved buying hard-to-find items or things that came in large quantity that would have to be stored, like red and white cotton string. That comes in bulk cones that weigh about 2 lbs and contain over 9,000 ft of string. The other options was to buy things from her craft line, which is not inexpensive.

I worked out my own solutions in the end, but given the amount of difficulty I had in locating everything, I thought I might note down where to find several particularly elusive items.

1. The biscotti were packaged in cardboard gift boxes with clear windows. These came from The Container Store.
2. The 1/4 lb coffee bags held the granola, and also came from The Container Store. They stock both items year-round and are priced quite reasonably, especially given the fact that I looked EVERYWHERE else and could not find anyone willing to sell less than 500 to me. I guess not many people want to buy just half a dozen bakery boxes and coffee bags.
3. As noted earlier, I purchased rolls of clear and colored cellophane from JoAnn online. The cellophane is better than wax paper for wrapping cookies in paper containers because grease will not seep through the plastic. The colored cellophane is more attractive too. If you have the patience, you can also use it to wrap the cookies on their own. Tie a pretty ribbon or a strip of patterned paper around it to give a nice touch.
4. Knowing that the USPS was not going to care about the heat and humidity around my packages, I purchased mini desiccant envelopes to keep my cookies and brittle in good condition until they reached their destinations. I found a good deal at http://www.silicagelpackets.com, but you can buy them from camera supply stores, too.
5. To decorate the plain white biscotti boxes, I used a glue gun to apply thin red or green ribbon at the base, and then added a festive cardboard circle to the top. A short box got glittery cardboard letters instead. I did the same with the coffee bags full of granola. The cardboard cutouts came from a box of decorative cutouts meant for scrapbooking.
6. I purchased my treat bags from Michaels as well, and they were TERRIBLE. I made the mistake of putting the peanut brittle into those packages, and they poked right through the bag, making a big mess. Next year I will go back to treat bags from Target - those have never let me down.
7. Mini Christmas tree ornaments from Michaels came in a set of 16 and looked very nice tied to bags of cookies.

Hopefully this list can save someone some time next year.

Adding a fleece lining to a knit hat

This is Part II to the story of that white hat I knit following Elizabeth Zimmerman's instructions in Knitting Workshop. Nice hat, but unfortunately, it wasn't windproof. As I intended to give it to my brother-in-law to fend off Ohio winters, something obviously had to be done to beef it up. But how does one sew a knitted fabric to a woven one? The answer came from a wonderful blog called TECHknitting that shows you step-by-step, with clear diagrams, the solutions to all those questions that keep knitters up at night. I followed her instructions and here are some pictures.

First I pinned the fleece over my brother-in-laws head to make sure I had the right size. I then cut out the shape and sewed it up right-quick on my sewing machine. Coulda done it by hand, but the machine was there and made neater, closer stitches than I could ever hope to. As you'll notice in the picture below, the lining is a little bigger than the hat itself, but that's OK because the hat will stretch a lot, while the fleece (which does have horizontal stretch, but not vertical) will not stretch nearly the same amount.


Next I flipped the knit hat inside out, and placed it INSIDE the new fleece lining, which was right-side out, as you can see from the picture. I then followed TECHknitting's instructions on how to use the overcast stitch to create a stretchy seam so the hat would stretch over the wearer's head, and voila, I was done!
I didn't take a picture of the finished hat since it doesn't look much different and my brother-in-law wasn't around to model it anyways. It went in the Christmas care package I sent over (more on that later). He loved it, but unfortunately, so does his wife. She refused to take it off for the first day; by that night he admitted defeat. No worries though. I had more of the same lovely Green Mountain Spinnery yarn left, with which I knit him another in a Fair Isle pattern. I have lots of fleece left over so that one'll be lined, too, once he shows up to let me measure his head again. Thanks for the helpful and clear instructions, TECHknitting!

Friday, January 16, 2009

Knitting on the edge

Ok, so when I’m bored at work I surf Ravelry… (hey, at least it’s not p#rn). The other day I found this awesomely cool scarf knit knit by Raveler Mimizuku* using - get this!! - HER FINGERS.


I wrote the person who did it and she was kind enough to share this Japanese-language YouTube video. No translation necessary. Check it out.

It also helps that she went to a yarn store that wound up three types of yarn for her to make such a unique yarn. Ahhh...the Japanese always do it better.
*Mimizuku has no blog or Web site of her own to link to, otherwise I would do so. I have tried to give credit where credit is due.

Saturday, January 10, 2009

Chocolate Marshmallow Cookies (Part 3?): Fan's Attempt

2009-01-10 Kea's Cookies 1


I'm going to a potluck party tonight, so what better time to try Kea's cookie recipe? It was pretty much a breeze, but next time I may opt for a dark chocolate bar with less cocoa content. I picked a 100% cocoa bar. It might be a little too intense for some people (i.e., not hardcore chocolate lovers!). Of course, when the first sheet of cookies finished cooling, I had to test a cookie! It was "whoa" at first bite. Kea, this is an amazing recipe. I had to remind myself that I was baking these for the party, so after one more "test", I packed them up. I'll report back here if I get any feedback. Thanks for sharing your recipe!

2009-01-10 Kea's Cookies 2

Sunday, January 04, 2009

PG-13

I learned how to say "oral s*x" in Cantonese today.

It's amazing, the things you can pick up from watching television without parental supervision.

Friday, January 02, 2009

Awesome Ass-Kicking Chocolate Marshmallow Cookies (Part 2), Plus Ninjas


Boyfriend has a coworker/friend who we call the Food Ninja, so named for his amazing and stealthy ability to make food disappear extremely quickly. Many a time have we sat down to dinner with him only to discover a dumpling here, a french fry there, vanish right out from under our noses. Many a time has Boyfriend set out a large bag of chips at the office for everyone to munch on, only to come back moments later and find them all gone. Since there are only five people in his office, this is very impressive. And usually the only evidence is a particularly satisfied look on the Food Ninja's face.

So for Christmas, I made the Food Ninja a batch of cookies. And then I wrote "Awesome Ass-Kicking Chocolate Marshmallow Cookies" on the box, and drew a ninja on it. Unfortunately, I didn't take a picture of it before I gave it away. A few days later, I received this email from him, fowarded via Boyfriend.


"Please tell [Kea] she has taught the Food Ninja the all important lesson in life that is to savour good food. The ass kicking cookies proved to be so ass kicking the Ninja couldn't finish them in under 2 seconds; he had to savour each and every one of them. Thank you, they were beautiful."


I'm not normally that good of a baker, so this made me very happy. And then he asked for the recipe. I've tweaked it since last time, having procured some pure cocoa powder. So here's the non-hack recipe.

Ingredients

1 1/4 cup plain flour
2 tbsp pure cocoa powder
1 tsp baking powder
1/4 tsp salt

100g butter (slightly less than half a block)
1/2 cup white sugar
1 egg

Dark chocolate fragments (break up a Lindt bar, and then break up each square into 4 pieces)
Mini marshmallows

Directions:
1. Sift the dry ingredients (flour, cocoa powder, baking powder, and salt) together. Set aside.
2. Cream the butter and sugar together until light and fluffy, whisk in egg.
3. Add the flour mixture to the butter mixture, combine well.
4. Refrigerate dough for 2 hours. Meanwhile, preheat oven to 175 degrees celsius, and line cookie sheets with baking paper.
5. Roll the dough into 1 inch balls with a chocolate fragment and a marshmallow stuffed inside. Make sure no marshmallow or chocolate is exposed, it'll melt out.
6. Place 2 inches apart on baking tray, and bake for 10 minutes. They should be still soft to the touch when removed from the oven.
7. Allow to cool on tray for 5 minutes, then transfer to wire rack.

If you are any fan of chocolate at all, you have to try these. I may never invent a recipe this good ever again, not least because I have no idea what I'm doing and I just got really lucky. These kick so much ass they have to import extra asses from China just to fill the demand for kicking. If I may say so myself.

Lentil Tagine

In a curious exchange of roles, I always worry that my parents, particularly my father, aren't eating properly. Just because dad is relatively healthy for his age, he insists on eating like a boy of twenty; beef, heavy sauces, tonnes of sugar in his coffee, and sweets. (I know where I got my sweet tooth from!) And then, when it's just the two of them, it's easy to get into a rut and eat all sorts of unhealthy and/or unimaginative (!!) things.

The thing is, I know they appreciate good food, and they can be made to be adventurous, too. So, I took a little gamble and made a Moroccan lentil tagine using our pressure cooker. I say it was a gamble because they don't often enjoy things with a lot of "foreign" herbs and spices (that is, those not normally used in Chinese cuisine), especially cumin, which the tagine has.

I still don't think my dad enjoyed this very much. He ate it, but when my mother complimented the dish and had more, he didn't say anything, which is tantamount to saying he didn't like it. However, my mother has never hesitated to tell me that something I made doesn't taste good, so I feel that I can trust that she truly liked it. A, who isn't much for stews, seemed to like it well enough, too. The greatest compliment came from my cousins, though. They tried some when they came over for New Year's dinner. They're terribly picky (at least, I think they are, but I'm a foodie), but kept going back for more.

New Year's En Famille

A and I have been spending Christmas and New Year's at home in Oregon with my parents. We had dinner on Christmas Eve at my uncle's house so, apart from A making some mashed potatoes to bring over, we didn't cook too much. For New Year's, we had my uncle's family over, and I was in charge of making dinner. After the excesses of Christmas Eve, I wanted to be sure that we had a slightly healthier (though still delicious!) meal for New Year's. I started early in the morning, marinating the chicken, baking dessert, and working on the cobb salad.
This was my first time making a cobb salad (a little too much trouble, wouldn't you say, for one person?), but I absolutely adore eating them; everything is perfectly bite-sized so that you don't have to have bits of salad green hanging out of your mouth. I roughly followed the recipe from Cooks Illustrated, making the dressing, but approximating all the other ingredients. I used turkey bacon instead of pork bacon, too. There was so much salad, and no big serving plates in the house, so I rubbed our wok with oil (to prevent rusting) and used it as a serving vessel; it was perfect. Everyone really enjoyed the cobb salad, and it was pretty much demolished.
In order to encourage everyone to have more vegetables, I also made a simple Asian salad, with mesclun mix, sliced almonds, dried cranberries and mandarin oranges. I also made an Asian-inspired dressing to go with it, mixing together balsamic vinegar, soy sauce, olive oil, salt, pepper and a dash of sesame oil. This salad quickly disappeared, as well.

We also had oven roasted Brussels sprouts with whole cloves of garlic. A deemed them slightly overcooked, so he didn't take any pictures. But, as a fan of Brussels sprouts, I think they were still delicious.
A was responsible for marinating and cooking the steaks. My family is not fond of sirloin, and normally goes for rib eyes. However, we've found that flat-iron steaks are excellent, too. Moreover, they are conveniently sized in approximately single-person portions, so we decided on flat-iron steaks, which were a success. Really, I think porterhouses and T-bones are over-rated.
My uncle brought over two fresh Dungeness crabs, which we steamed Cantonese-style with ginger and scallions. These were served with dark Chinese vinegar. I'm a very lazy crab-eater, meaning I can't usually be bothered to eat more than a piece or two. With my added handicap of braces, I only had one piece, which was enough to satisfy me.
For dessert, A had requested key lime pie. This request, coming from him, surprised me, since he dislikes sour things almost as much as our father does. It turned out to be an excellent choice, however. Even dad went back for more, and it was deemed very refreshing after a large meal.
The only thing that didn't really get eaten was all the rice we had made, for the eight of us! We had so much rice left over, A made fried rice today (by himself, for the first time). I won't embarrass him with the telling of it (ask him yourself!), but the rice is all gone now, too.